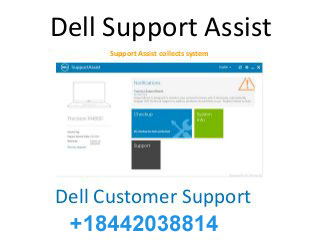


If you know dell Support Assist Monitor and check your computer hardware health. Other software as well as your computer. and this tool is most important and useful your Dell computers, but Some Dell User can encounter ‘Dell Support Assist not working‘. If your Device is facing this types of issue you read this article and fix it easily. You can be completing all Step you will be able to solve this issue in easily in your own.
How to fix it Dell Support Assist not working Error.
If you want to solve these types of issue flow this given some step to fixes troubleshoots this type of particular error in your device.

Step 1: Delete all the files and Uninstall Support Center
If you want to Settle in these types of fault, firstly Unistal the Dell Support Center from your computer or device. Otherwise, delete all files and folder in your device related to Dell Support Assist or Dell Support Center. Follow Some step to solving this Issue given in these perfect action:
1. Firstly you use key bord and hold ‘windows logo’ key + ‘R’ and launch the Run Dialogue box.
2. After that opened Run dialogue box, and type “appwiz.cpl” and click or hit Enter and another window are appear then open the Programs and Features option.
3. Then after you go to the Dell Support Center and Dell Support Assist.
4. First done, Dell Support Center or Dell Support Assist right-click and do this.
5. At the Moment, Select the option.
6. You steel waits until your computer or device finishes the removing procedure of Dell Support Assist or Dell Support Center.
7. First done, hold the Windows logo key as well as the E button to reopen the Windows Explorer and File Explorer.
8. See the right side of windows, and tap to My Computer section or PC.
9. Now, You go to C Program files and remove or delete it the name of Dell Support Assist and Dell Support Center.
10. Then after, Go to C drive and find location name C:\Users\*YOUR USERNAME*\AppData\Local\Temp and removing all files and folder Temp.
11. After done, In C drive go to the section with is C:\Users\*YOUR USERNAME*\AppData\Roaming and remove PCDR folder.
Then after once done, Restart your Windows device. then after you will be able to solve this issue on your own.
Step 2: Do Restore your Device Or Computer
1. If you can able and solve this issue firstly perform a system restore process in your dell device in another way to resolve this particular error. in this instance, Flow this given step in below:
2. Firstly, find it Cortana section the Windows 10 Device.
Find it, and tap on the Create a restore point section.
3. Done it, you easily see the system properties your computer or devices will begin containing and appearing the settings in the restore point. In this computer window, Next, you go to Protection Setting and Enabled it in the Local Disk C (Computer Drive).
4. If you see disable notice it, after that, you have to choose that disk as fine and tap Configure tab and enable it.
5. Then after, You have to full access to allocate the maximum disk space and allow it System Protection.
6. you have set it as per your requirement.
7. Then after, You tap to apply option and choose hit OK Option to apply changes.
8. After that, you always find the changes in your device whenever. your computer or device will be creating a restore point automatically.
Then after check you Error Status. It is found, try to another method it’s given it.
Step 3: Reinstall Windows Operating System
If your problem is not to be solved. firstly backup your device data in an external Device. Reinstall your Computer or Device. Then after Installed Drivers and Software.
If your problem is not solved. you contact our Dell Support Assist not working Technical Support Number a certified technician can help you and find your eject problem, issue and solve.
The certified technician solves problems in several minutes.